How Do I Apply Setting Powder?
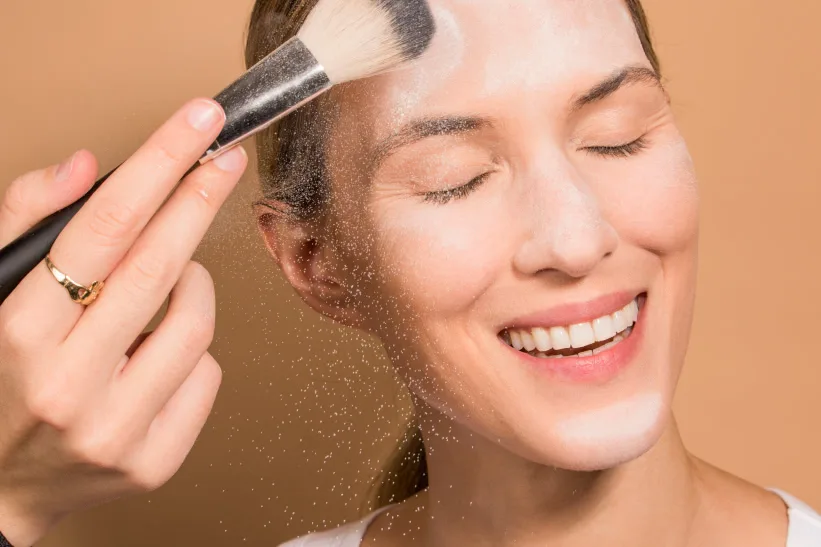
Image source: Bing (Web (fair-use with source credit))
You've perfected your foundation, blended your concealer, and maybe even added a touch of blush. Now, the million-dollar question: how do I apply setting powder so it actually lasts and doesn't make me look like a ghost? It’s the step that can make or break your makeup's staying power, turning a good look into an all-day masterpiece.
Get it right, and your makeup stays put through anything. Get it wrong, and you might end up with cakiness or unwanted dryness. We've dug into manufacturer specifications and aggregate user feedback to bring you the most effective methods, ensuring your makeup looks freshly applied for hours, with minimal effort on your part.
Quick Answer: The Art of Setting Your Makeup
Apply setting powder after all liquid and cream makeup. Use a fluffy brush for light application all over, or a damp sponge for targeted "baking" under eyes. Choose a powder type based on your skin: mattifying for oily, hydrating for dry.
Tap off excess to avoid a powdery look.
Setting Powder: What Kind is Right for Your Skin?
Choosing the right setting powder is your first, and perhaps most crucial, step. It's not a one-size-fits-all situation; what works wonders for one person might not be ideal for another. Our research indicates that tailoring your powder choice to your skin type significantly impacts the final finish and longevity.
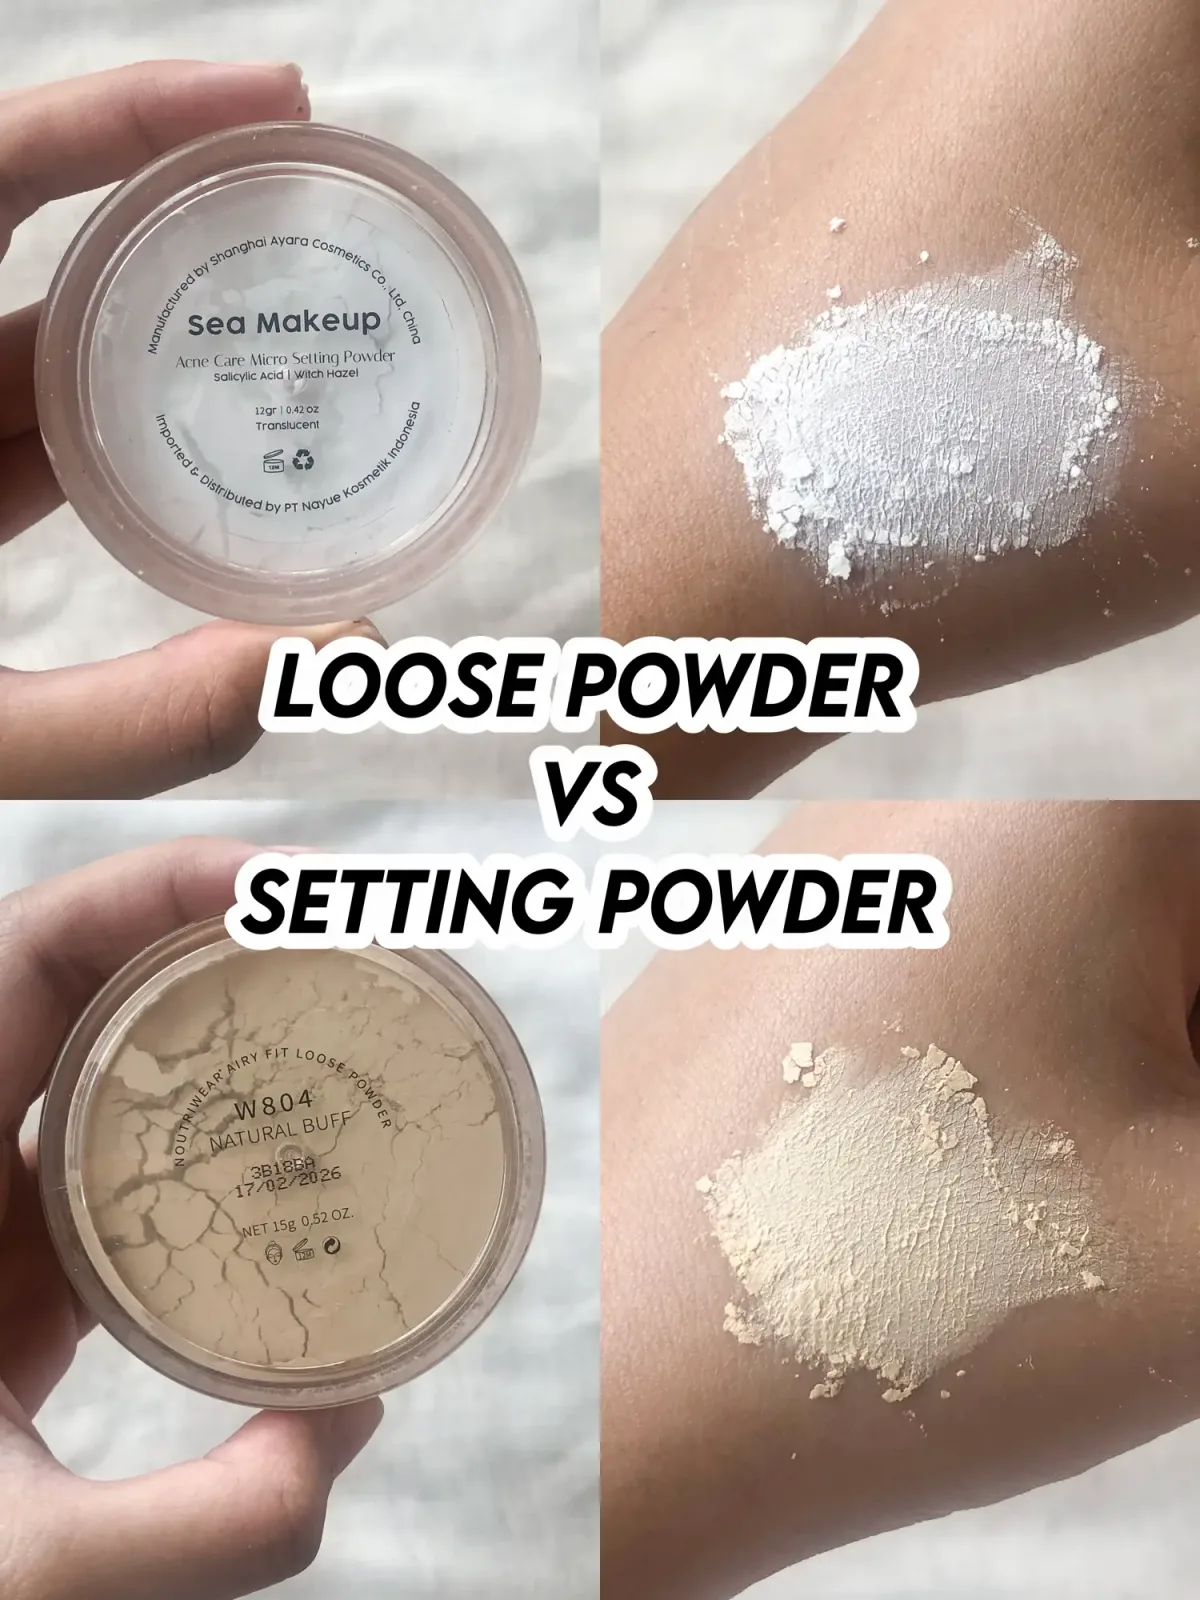
- Translucent Powder: This is your chameleon. It’s colorless and designed to set makeup without altering the shade of your foundation or concealer. It works well for most skin tones and types, providing a natural, matte finish. Aggregate reviews report it's a safe bet if you’re unsure where to start.
- Mattifying Powder: If shine is your nemesis, a mattifying powder is your secret weapon. These are engineered with oil-absorbing ingredients to combat excess sebum. Manufacturer specifications often highlight their effectiveness for individuals with oily or combination skin. Expect a velvety, shine-free finish.
- Luminizing/Radiant Powder: For those who prefer a dewy or glowing complexion, luminizing powders are the way to go. They contain fine particles that reflect light, giving your skin a subtle radiance. These are particularly beneficial for dry or mature skin types that can sometimes look dull or flat with traditional mattifying powders.
- Tinted Powders: Available in various shades, tinted powders can offer a bit of extra coverage or color correction. They can help even out skin tone further or provide a subtle warmth. However, it’s vital to select a shade that closely matches your foundation to avoid looking unnatural.
Choosing wisely here means the difference between makeup that enhances your natural features and makeup that looks like an extra layer.
Step-by-Step: How to Apply Setting Powder Like a Pro
Applying setting powder is less about technique and more about understanding your base and your desired outcome. We've gathered insights from makeup artist demonstrations and manufacturer guidelines to create a straightforward process. This approach ensures your makeup stays put without feeling heavy or looking cakey, as of 2026.
Preparing Your Canvas
Before any powder touches your face, ensure your base makeup is complete and well-blended. This means foundation and concealer should be applied and smoothed out. If your concealer has started to settle into fine lines, gently pat it back into place with your ring finger or a clean brush.
Application Methods
The tool you use and the way you apply the powder will dictate the finish.
- For a Light, All-Over Set:
- Dip Your Brush: Take a fluffy, soft brush and lightly swirl it into your chosen setting powder.
- Tap Off Excess: Crucially, tap the brush against the side of the powder container or your hand to remove any excess product. This prevents a heavy, powdery look.
- Gentle Sweeping: Lightly sweep the brush across your face. Start with your T-zone (forehead, nose, chin) and then gently dust over the rest of your face.
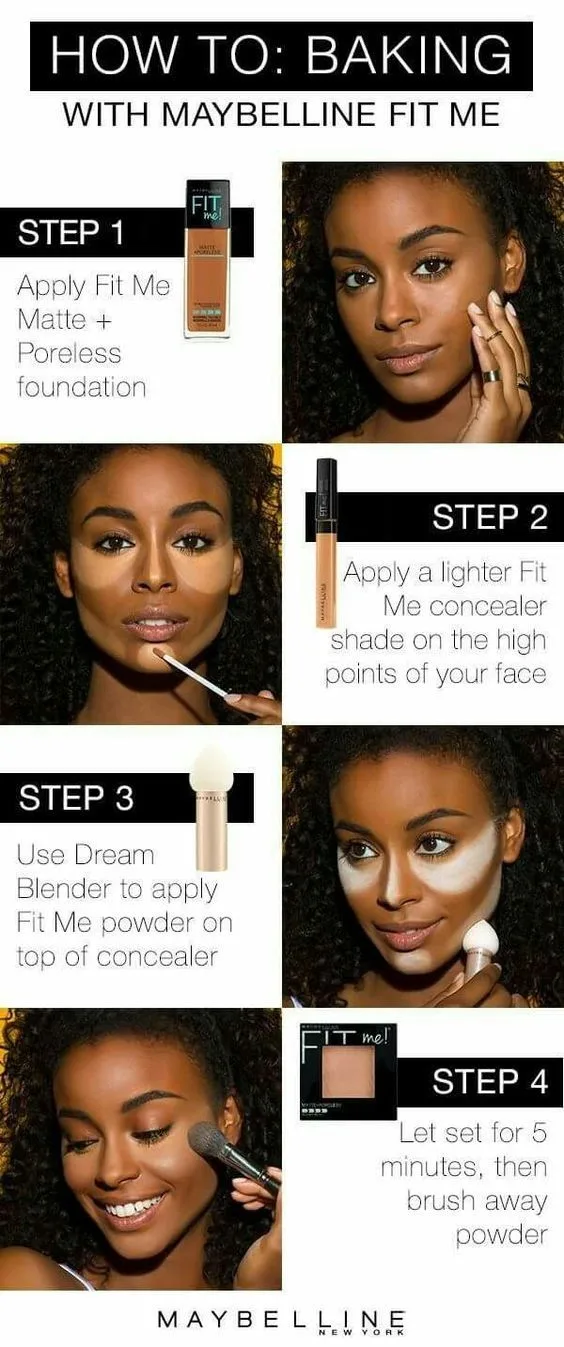
- For Targeted Setting ("Baking"):
- Generous Application: Using a damp makeup sponge or a powder puff, pick up a significant amount of translucent or finely milled setting powder.
- Press and Pat: Firmly press the powder onto areas where you want maximum longevity and creasing prevention, such as under the eyes and the sides of the mouth.
- Let It Sit: Allow the powder to sit on the skin for 5-10 minutes. This "baking" process lets body heat meld the powder into the makeup.
- Dust Away Excess: Gently brush away the excess powder with a clean, fluffy brush.
The key is always to start with less and build up if needed, rather than applying too much at once.
Baking vs. Dusting: Choosing Your Application Method
When it comes to setting your makeup, there are two primary techniques that offer distinctly different results: dusting and baking. Understanding which method suits your needs, whether you’re aiming for everyday wear or professional-level longevity, is essential for achieving a flawless finish. Our analysis of user feedback and editorial reviews suggests that each technique excels in different scenarios.
Dusting: The Everyday Approach
- What it is: Dusting involves using a large, fluffy brush to lightly sweep a small amount of setting powder over the entire face.
- Tool: A large, fluffy powder brush or a large kabuki brush.
- Process: Lightly swirl your brush into the powder, tap off ALL excess, and then gently sweep across the face.
- Best For:
- Quick touch-ups throughout the day.
- A natural, lightweight finish.
- Setting makeup for normal to dry skin.
- Those who prefer a subtle mattifying effect without looking overly powdered.
- Outcome: A softly set base that reduces shine and helps makeup last, but without heavy coverage.
Baking: The Powerhouse Technique
- What it is: Baking involves applying a thick layer of powder to specific areas of the face and letting it sit, or "bake," for several minutes. This allows the heat from your skin to fuse the powder with your makeup, creating an incredibly smooth, long-wearing, and creaseless finish.
- Tool: A damp makeup sponge or a powder puff.
- Process: Using a damp sponge or puff, press a generous amount of translucent powder onto areas prone to creasing or oiliness (under eyes, smile lines, T-zone). Let it sit for 5-10 minutes, then gently brush away the excess.
- Best For:
- Achieving maximum makeup longevity.
- Preventing creasing, especially under the eyes and around the mouth.
- Creating a flawless, blurred effect.
- Individuals with very oily skin or those who need their makeup to last through long events.
- Outcome: A highly durable, matte, and smoothed-out finish in targeted areas.
Choosing between dusting and baking depends on your skin type, the desired look, and how long you need your makeup to last. For a quick daily set, dusting is efficient. For events or areas that need serious staying power, baking is your go-to.
Mistakes to Avoid: Common Setting Powder Errors
Even with the right products and techniques, it's easy to fall into common setting powder pitfalls. Our review of user forums and expert guides highlights recurring issues that can lead to less-than-ideal results. Avoiding these simple mistakes can make a huge difference in how your makeup looks and wears throughout the day.
- Applying Too Much Powder: This is perhaps the most common error. Using too much powder, or pressing it too heavily all over the face, can lead to a dry, cakey appearance. It can also make your makeup look flat and mask your skin’s natural texture.
- What to do instead: Always tap off excess powder from your brush or sponge. Start with a light hand and build coverage only where you need it. If you’ve overdone it, try buffing the excess away with a clean, fluffy brush.
- Using the Wrong Powder for Your Skin Type: Applying a highly mattifying powder to already dry or dehydrated skin can accentuate dryness, flakiness, and fine lines. Conversely, a luminous powder on very oily skin might not provide enough oil control.
- What to do instead: As discussed, choose a setting powder that complements your skin type. Mattifying for oily, hydrating/luminizing for dry, and translucent is often a safe bet for most.
- Applying Powder to Wet Makeup: If you try to set liquid or cream products immediately after application, the powder can grab and create a patchy, uneven finish.
- What to do instead: Ensure your foundation and concealer have had a moment to settle. Gently pat any excess liquid or cream away before you start powdering. For baking, this is especially important before layering on that thick powder.
- Forgetting to Dust Off "Baked" Powder: Leaving too much powder on after baking can result in a very dry, white, or overly powdered look.
- What to do instead: Be thorough when dusting away the excess. Use a clean, large brush and ensure all loose powder is removed gently.
By being mindful of these common slip-ups, you can ensure your setting powder application contributes to a smooth, natural, and long-lasting makeup look.
Expert Tips for a Flawless, Long-Lasting Finish
To elevate your setting powder game from "good enough" to genuinely impressive, consider these pro-level tips. These strategies, gleaned from editorial analysis of beauty industry best practices, go beyond the basics to help you achieve a professional, seamless finish every time. They focus on preparation, precision, and product synergy for makeup that truly endures.
- Layer Strategically: Instead of one heavy application, try a few light layers. For instance, a light dusting all over first, followed by targeted baking under the eyes or in the T-zone, can offer superior longevity without looking heavy. This approach is often recommended by makeup artists for red-carpet-ready looks.
- Consider a Setting Spray Combo: For ultimate staying power, pair your setting powder with a setting spray. After dusting or baking, lightly mist your face with a setting spray. This helps meld the powder into your skin, reduces any powdery appearance, and adds an extra layer of hold. Some sprays are designed to be applied before powder to prep the skin, while others are for finishing.
- Warm Your Tools: If using a powder puff or sponge for baking, the slight warmth from your hands can help the powder adhere better and melt into the skin. Gently warming the puff or sponge in your hands for a few seconds before picking up powder can make a difference.
- Target Shine Hotspots: Most people have specific areas that get oily faster than others. For example, the sides of the nose and the forehead often need more attention. Instead of powdering your entire face evenly, focus on these "hotspots" for touch-ups or with your baking technique. This prevents drying out areas that don't need it.
- Don't Forget the Neck: For a truly seamless look, extend your powder application slightly down your neck, especially if you’re wearing a lower neckline. This helps to even out your skin tone and prevent harsh lines between your face and neck.
- Listen to Your Skin: Pay attention to how your skin feels and looks throughout the day. If you notice dryness, switch to a more hydrating powder or adjust your application. If shine persists, you might need a more robust mattifying product or a different application technique.
These expert insights can help you harness the full potential of your setting powder, ensuring your makeup looks as good at the end of the day as it did when you first applied it.
Frequently Asked Questions
How long does setting powder last on the skin?
Setting powder's longevity varies, but typically it helps makeup last between 8 to 16 hours. Factors like skin type, climate, and application technique influence this duration. Oily skin may require touch-ups sooner than drier skin types.
Can I use setting powder without foundation?
Yes, you absolutely can. Setting powder can be used to mattify bare skin, reduce the appearance of pores, or simply to absorb oil. It can also help set concealer without the need for foundation.
Should I apply setting powder before or after blush/bronzer?
Generally, you apply setting powder after liquid or cream blush and bronzer, but before powder versions of those products. This ensures the creams are locked in. If using powder blush/bronzer, apply it after setting powder for best blendability.
What’s the difference between setting powder and finishing powder?
Setting powder primarily locks makeup in place and controls oil. Finishing powder, often finer and more luminous, is applied last to blur imperfections and give a soft-focus effect, but doesn't offer the same longevity as setting powder.
How do I prevent my setting powder from looking chalky?
Ensure you tap off all excess powder from your brush or puff. Use a very light hand, and opt for finely milled or hydrating powders if you have dry skin. A light mist of setting spray afterward can also help melt the powder into your skin.