How Do I Clean a Facial Steamer?
You've got your facial steamer, ready to give your skin that spa-like treatment. But over time, you might notice its performance dips, or perhaps you're just wondering about the best way to keep it hygienic. Cleaning your facial steamer is crucial for both its effectiveness and your skin's health.
Our research indicates that regular maintenance prevents mineral buildup, ensuring consistent steam output. Following manufacturer specifications for cleaning, such as those outlining descaling with a 1:1 vinegar-water solution, can significantly extend your device's lifespan. This guide will walk you through the straightforward steps to keep your steamer in top condition.
Quick Answer
To clean a facial steamer, start by unplugging and letting it cool. Empty the water tank and wipe it clean with a damp cloth. For deeper cleaning and mineral buildup, run a cycle with a vinegar-water solution and then rinse thoroughly.
Always dry all parts completely before storing or next use.
Why Cleaning Your Facial Steamer Matters
A clean facial steamer isn't just about aesthetics; it's fundamental to its performance and your skin's well-being. Over time, mineral deposits from tap water can accumulate inside the device. These deposits, often referred to as limescale, can clog the delicate internal components, most notably the nozzle.
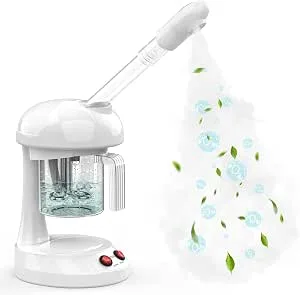
Image source: Bing (Web (fair-use with source credit))
When the nozzle gets clogged, the steam output becomes weak, sputtering, or uneven. This drastically reduces the effectiveness of your steaming session, meaning you're not getting the full benefits for your skin. Beyond performance, any residual moisture left standing in the tank can potentially become a breeding ground for unwanted bacteria or mold.
Regularly cleaning your steamer ensures you're always breathing in clean, pure steam, and it significantly prolongs the life of your device, preventing premature wear and tear.
Common Facial Steamer Problems: What's Going Wrong?
Are you experiencing issues with your facial steamer? You're not alone. Aggregate user feedback and manufacturer specifications point to a few recurring problems that almost always stem from a lack of regular cleaning.
Identifying these issues is the first step to getting your steamer back in tip-top shape.
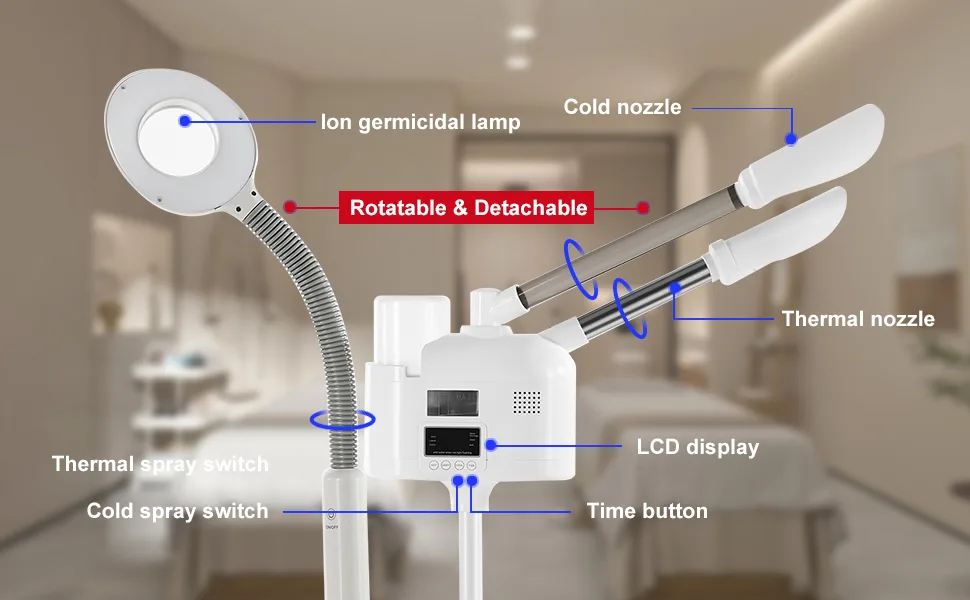
Image source: Bing (Web (fair-use with source credit))
- Weak or Sputtering Steam: This is the most common complaint. It’s a clear sign of mineral deposits, typically calcium and magnesium from your tap water, building up inside the heating element and nozzle.
- Uneven Steam Distribution: Instead of a consistent cloud, the steam might come out in short bursts or from only one part of the nozzle. This is another indicator of blockages.
- Strange Odors: A musty or chemical smell when you turn on the steamer often means there's residue from old water or, in worse cases, potential mold growth within the tank or tubing.
- No Steam at All: This can be due to a severe blockage completely preventing water from reaching the heating element or a malfunction caused by severe mineral buildup.
If you've noticed any of these, don't worry. These issues are typically fixable with a good cleaning. The solution often involves a simple descaling process, which we’ll cover in detail.
Your Steamer Cleaning Decision Tree: What's Your Situation?
To tackle cleaning effectively, we first need to figure out what approach your facial steamer needs right now. The process can vary slightly depending on how often you use it and whether you're dealing with everyday upkeep or a more stubborn buildup. Think of this as your quick guide to choosing the right cleaning path.
Routine Maintenance: Keeping it Fresh After Every Few Uses
If your steamer is working well and you're just looking to keep it that way, routine maintenance is your best bet. This is about prevention. By performing these simple steps after every few uses, you significantly reduce the chances of mineral buildup forming in the first place.
It’s like doing a quick tidy-up before things get messy, saving you time and effort in the long run. This basic cleaning involves emptying, wiping, and drying the main components.
Deep Cleaning & Descaling: Tackling Mineral Buildup
If you're experiencing issues like weak steam, sputtering, or strange odors, it's time for a deeper clean, also known as descaling. This process specifically targets the mineral deposits that have accumulated inside your steamer’s water tank and heating element. It’s a more thorough intervention designed to break down and flush out these stubborn residues.
This type of cleaning is recommended periodically, especially if you live in an area with hard water. Following a descaling protocol typically involves using a mild acidic solution to dissolve the mineral deposits.
Step-by-Step: How to Deep Clean Your Facial Steamer
When your facial steamer needs more than just a quick wipe-down, deep cleaning and descaling are the way to go. This process is vital for restoring performance and ensuring hygienic operation. We’ll guide you through the most effective methods using common household items.
Using Vinegar for Descaling
Distilled white vinegar is a fantastic, readily available descaler. Its acidity effectively breaks down mineral deposits, or limescale, that can form in your steamer's water tank and heating element. Performing this regularly can prevent clogs and keep your steamer working efficiently.
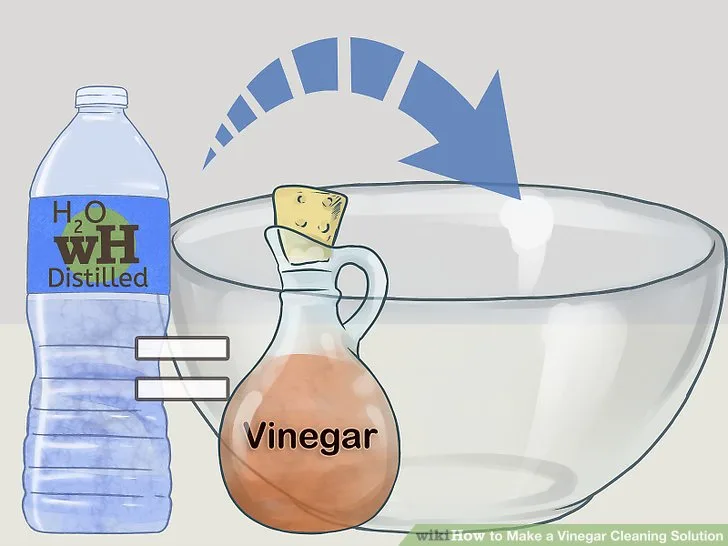
Image source: Bing (Web (fair-use with source credit))
- Prepare the Solution: Mix equal parts distilled white vinegar and distilled water. For example, if your steamer's tank holds 100ml, use 50ml of vinegar and 50ml of water. Using distilled water is key here; it won't add new minerals to the system.
- Run a Cycle: Pour the mixture into the steamer's water tank. Turn the steamer on (ensure no facial attachments are in place) and let it run for about 5 to 10 minutes. You want it to heat up and begin steaming.
- Soak: Turn the steamer off. Let the vinegar solution sit inside the tank and internal components for at least 30 minutes, or up to an hour, to allow the acid to work on the mineral buildup. You might hear fizzing sounds as it breaks down deposits.
- Empty and Rinse: Carefully empty the vinegar solution. Then, fill the tank with fresh, distilled water and run a full steam cycle. This flushes out any remaining vinegar residue and loosened mineral particles. Repeat the rinsing process two to three times to ensure no vinegar smell or taste remains.
- Final Wipe and Dry: Once fully rinsed, empty the tank one last time. Wipe down the exterior and interior of the tank, as well as the nozzle, with a soft, clean, dry cloth. Ensure all parts are thoroughly dry before reassembling or storing. This entire descaling process is crucial for maintaining the optimal function of your device, aligning with best practices for appliance care often cited by manufacturer specifications.
Using Citric Acid for Descaling
Citric acid is another excellent, food-grade option for tackling mineral buildup in your facial steamer. It's effective and often odorless, making it a preferred choice for some users. The process is very similar to using vinegar.
- Mix the Solution: Dissolve about 1 to 2 tablespoons of citric acid powder in a full tank of distilled water. Stir thoroughly until the powder is completely dissolved.
- Run a Cycle: Pour the citric acid mixture into the steamer's water tank. Turn the device on and let it run for 5 to 10 minutes, allowing it to heat and steam.
- Soak: Turn off the steamer and let the solution sit inside for 30 to 60 minutes. This soaking period is vital for the citric acid to break down accumulated mineral deposits.
- Empty and Rinse Thoroughly: Discard the citric acid solution. Fill the tank with clean, distilled water and run at least two to three full steam cycles to rinse out all residue.
- Dry Completely: After the final rinse, empty the tank and thoroughly dry all components, especially the water tank and nozzle, with a soft, dry cloth. Proper drying prevents new moisture-related issues.
Cleaning the Aromatherapy Cup
If your facial steamer includes a separate aromatherapy cup or compartment for essential oils, it requires its own specific cleaning attention. This area can accumulate oil residue or even dried plant matter if not cleaned regularly.
- After Each Use: Allow the aromatherapy cup to cool completely. Gently wipe it out with a dry or very slightly damp cloth. Avoid letting any liquids seep into adjacent electrical components or openings.
- Deeper Cleaning: If oil residue has built up or scents linger, you may need to remove the cup, if your model allows for easy removal. Wash it gently with mild soap and lukewarm water. Ensure it is completely dry before reattaching it to the steamer. Always refer to your device's manual for specific instructions on removing and cleaning this part, as designs vary and some components might not be user-removable for washing.
Essential Tools & Supplies for Steamer Cleaning
To get your facial steamer sparkling clean and performing its best, you’ll need a few basic items. These are mostly common household supplies that you likely already have on hand, making the cleaning process convenient and cost-effective. Having these ready before you start will ensure a smooth and efficient cleaning session.
Here’s a quick rundown of what you'll need:
- Distilled White Vinegar: Your primary weapon against mineral buildup. Its acidity is highly effective at dissolving limescale.
- Distilled Water: Essential for both diluting cleaning solutions and for thorough rinsing. Using distilled water prevents adding new mineral deposits.
- Citric Acid Powder: An alternative to vinegar for descaling, equally effective and sometimes preferred for its lack of scent.
- Soft, Lint-Free Cloths: For wiping down the water tank, nozzle, and exterior. Microfiber cloths work wonderfully here.
- Small Brush (Optional): A soft-bristled brush, like a soft toothbrush or a specialized cleaning brush, can be helpful for gently scrubbing stubborn residue inside the tank or around the nozzle if accessible.
- Manufacturer's Manual: Always keep this handy. It contains specific care instructions for your exact model, which is the ultimate authority on how to clean it without causing damage.
Having these supplies at the ready means you can tackle steamer cleaning whenever it's needed, ensuring your device remains a reliable part of your skincare routine.
Mistakes to Avoid When Cleaning Your Steamer
While cleaning a facial steamer is generally straightforward, there are a few common pitfalls that can damage your device or render your cleaning efforts ineffective. Being aware of these mistakes can save you from frustration and potential costly repairs. Our research indicates that avoiding these common errors is key to maintaining your steamer's performance and longevity.
- Using Tap Water for Rinsing: Always opt for distilled water when rinsing your steamer after descaling. Tap water contains minerals that will just reintroduce the very buildup you’re trying to remove, defeating the purpose of your cleaning efforts.
- Using Harsh Chemicals or Abrasives: Never use bleach, ammonia, abrasive scouring pads, or steel wool on your facial steamer. These can damage the plastic components, scratch the interior, or leave behind harmful residues that could be ingested or inhaled during steaming. Stick to vinegar, citric acid, and mild soap if recommended by the manufacturer.
- Submerging Electrical Components: Most facial steamers are electrical appliances and should never be fully submerged in water. Ensure the main unit is unplugged and kept away from water ingress, especially around the power cord and base.
- Not Drying Thoroughly: Moisture left behind in the water tank or nozzle can lead to mold or mildew growth. After cleaning and rinsing, always ensure all parts are completely dry before reassembling or storing the steamer.
- Ignoring the Manufacturer's Manual: While general advice is helpful, your specific steamer model might have unique cleaning requirements or prohibitions. Always consult your user manual for the most accurate and safe cleaning instructions for your device. Failure to follow these guidelines could void warranties or lead to damage.
By sidestepping these common mistakes, you ensure that your cleaning routine is both effective and safe for your facial steamer.
Expert Tips for Steamer Longevity and Performance
Keeping your facial steamer in prime condition goes beyond just occasional cleaning. A few proactive steps and consistent habits can ensure it continues to provide the best possible steam for your skin. These tips are based on best practices for appliance maintenance and user feedback collected over time, aiming to maximize your device's lifespan and your satisfaction with its performance.
- Prioritize Distilled Water: This is the single most effective way to prevent mineral buildup. While it might seem like a small extra step, using distilled water in your steamer from day one drastically reduces the need for frequent deep cleaning. It’s a key recommendation found in manufacturer specifications for most steam devices.
- Empty After Every Use: Don't let water sit in the tank longer than necessary. After you've finished your steaming session, empty any remaining water. This simple act prevents stagnant water from becoming a breeding ground for bacteria or mold and reduces the chance of mineral deposits forming.
- Store Properly: When not in use, ensure your steamer is stored in a dry, clean place. If possible, store it with the water tank lid open slightly or completely removed to allow air circulation, helping to dry out any residual moisture. This is part of maintaining good skincare appliance care.
- Inspect Regularly: Before each use, take a quick look at the nozzle. If you see any visible debris or mineral speckles, gently wipe them away with a dry cloth. This quick check can prevent small issues from becoming major clogs.
- Address Issues Promptly: If you notice a slight decrease in steam or a new smell, don't wait too long to perform a descaling. Tackling problems early makes them much easier to resolve and prevents them from worsening into serious malfunctions.
Implementing these expert recommendations ensures your facial steamer remains a reliable tool for your skincare routine, consistently delivering soothing and effective steam.
Frequently Asked Questions About Facial Steamer Cleaning
How often should I deep clean my facial steamer?
Deep cleaning, or descaling, is recommended every 2 to 4 weeks, depending on your water hardness and frequency of use. If you notice weak steam or unusual odors before this period, it’s time for a clean.
Can I use regular tap water in my facial steamer?
While you can technically use tap water, it's strongly advised against. Tap water contains minerals that cause significant buildup and clog the steamer's internal parts over time. Always use distilled water for optimal performance and longevity.
How can I tell if my steamer is clogged?
A steamer is likely clogged if you notice reduced steam output, inconsistent steam patterns, or if the steam seems to sputter rather than flow smoothly. A musty smell can also indicate trapped moisture and potential buildup.
Is it safe to put essential oils directly into the water tank?
No, most facial steamers are designed with a separate compartment for essential oils. Putting oils directly into the main water tank can damage the heating element or clog the system. Always use the designated aromatherapy cup or follow your device's specific instructions.
What if vinegar or citric acid doesn't remove the buildup?
If a thorough descaling doesn't resolve persistent clogs or weak steam, the buildup might be severe. In such cases, consult your steamer's manual for any advanced cleaning recommendations or consider contacting the manufacturer for support or repair options.