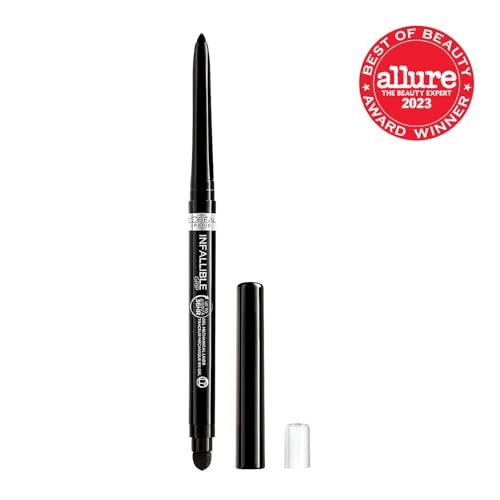
How Do I Apply Concealer Correctly?

Image source: Web (Bing) / yappe.in (Web image (fair-use with source credit))
Getting concealer right can feel like a secret handshake in the makeup world. You want that bright, awake look without any tell-tale signs of makeup, but sometimes it ends up creasing, looking cakey, or just… wrong. Luckily, nailing this is less about magic and more about understanding a few key visual cues and simple steps.
We've all been there, staring in the mirror wondering why our concealer isn't doing what we hoped. But with a little know-how, you can achieve a seamless finish. According to manufacturer specifications for many popular formulas, optimal coverage and blendability are achieved when using the correct application tools and techniques, with shade ranges often extending to over 40 options for precise matching.
Quick Answer
Apply concealer correctly by preparing your skin, choosing the right shade and formula, and using a tapping motion to blend. Start with a small amount under the eyes or on blemishes, then gently tap with a finger, sponge, or brush until seamless. Set with powder to prevent creasing.
Why Visuals Are Your Best Friend for Concealer Application
When we talk about applying makeup, especially something as targeted as concealer, visuals are non-negotiable. You can read a thousand words about blending, but seeing how that brush moves, where the light hits to show you're done, or what a fully blended edge looks like makes all the difference. Think of it like learning a new cooking technique; a recipe is great, but a video demonstration is what truly helps you get the hang of it.
For concealer, this means understanding how it interacts with your skin's texture and tone in real-time.
Understanding Undertones and Shade Matching by Eye
One of the biggest hurdles in concealer application is picking the right shade. It's not just about finding a color that looks right in the bottle; it's about how it interacts with your natural skin tone. This is where understanding undertones comes in.
Your undertone is the subtle hue that shows through your skin's surface, and it's usually warm (yellow, peachy), cool (pink, blue), or neutral. A concealer that matches your undertone will look like your skin, only better. If you pick one that's too pink for your warm skin, it can look ashy.
Too yellow for cool skin, and it might look orange.
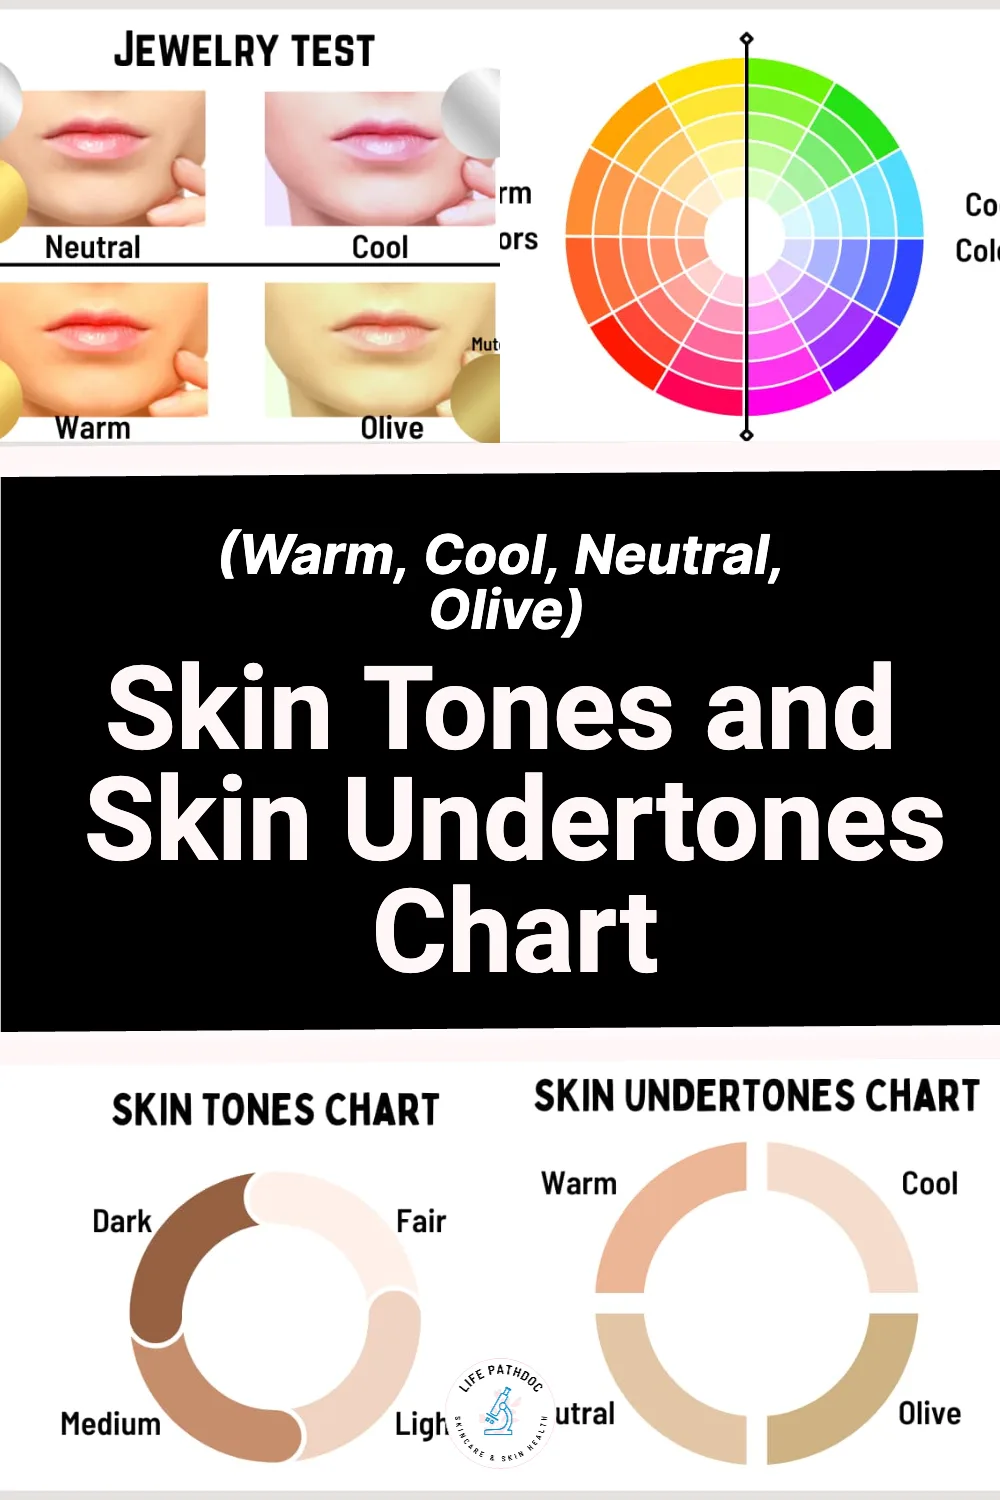
Image source: Bing (Web (fair-use with source credit))
- Warm Undertones: Tend to have yellow, peachy, or golden hues. Veins on the wrist might look greenish. Gold jewelry often complements this skin tone best.
- Cool Undertones: Tend to have pink, red, or bluish hues. Veins on the wrist might look blue or purplish. Silver jewelry often suits this skin tone best.
- Neutral Undertones: Have a balance of both warm and cool. Veins on the wrist might look blue-green. Both gold and silver jewelry tend to look good.
Matching your concealer shade means finding one that blends seamlessly with your foundation or your bare skin if you're not wearing foundation. For under-eye concealer, you might opt for a shade that's one to two shades lighter than your foundation to bring brightness. For blemishes, a perfect match is key to making them disappear.
Spotting the Right Concealer Finish for Your Skin
Beyond shade, the finish of your concealer plays a huge role in how it looks on your skin. We're talking about whether it’s matte, satin, or dewy. A matte finish can be great for controlling oil and preventing shine, especially if you have oily skin or are covering blemishes that tend to get shiny.
However, matte concealers can sometimes look dry or settle into fine lines if your skin is on the drier side.
A satin finish offers a balance, looking natural and skin-like, which is often ideal for under-eye areas because it doesn't look too flat or too shiny. Dewy finishes can add a subtle luminosity, making the skin look hydrated and fresh. However, if you have oily skin, a dewy concealer might not last as long and could contribute to unwanted shine.
Choosing the right finish ensures your concealer looks like a natural extension of your skin, not a mask.
Step-by-Step: Applying Concealer Like a Pro (See It to Believe It)
Applying concealer effectively is a process that benefits greatly from visual guidance. You need to see the gentle pressure, the precise placement, and the subtle blending that creates a flawless finish. This isn't about aggressive rubbing; it's about a careful, strategic application that works with your skin's natural features to conceal imperfections and enhance your look.
Preparing Your Canvas: Skin Prep for a Seamless Blend
Before any makeup, especially concealer, your skin needs to be ready. This means starting with a clean, moisturized base. If your skin is dry, concealer can cling to patches and emphasize texture.
If it's oily, it might slide around and crease. A good primer can also make a significant difference. For the under-eye area, an eye cream can hydrate and plump the skin, creating a smoother surface.
- Cleanse: Start with a gentle cleanser to remove any dirt, oil, or residual makeup.
- Moisturize: Apply your regular moisturizer, and for the under-eye area, use a dedicated eye cream. Let it absorb for a few minutes.
- Prime (Optional but Recommended): A primer can help create a smoother canvas and extend the wear time of your concealer. Choose one suited to your skin type (hydrating, mattifying, or pore-minimizing).
Proper skin prep ensures that the concealer has a smooth surface to adhere to, minimizing the chances of creasing or looking cakey. This initial step is crucial for any makeup application, but it’s especially important for targeted products like concealer.
Strategic Placement: Where to Dot and Swipe for Impact
Where you place your concealer is just as important as the product itself. For dark circles under the eyes, our research indicates that applying product in the inner corner, where shadows are deepest, and then slightly outward can effectively brighten the area. Avoid applying a thick line all the way across; focus on the areas that need it most.
Think of it as strategic highlighting and concealing, not just covering.
For blemishes, you want to apply concealer directly onto the spot, trying to avoid the surrounding healthy skin as much as possible. This prevents spreading bacteria and ensures you're only covering the imperfection. A small, precise amount is key here to avoid a heavy, noticeable patch of makeup.
If you're using a color corrector first, apply that to the blemish or under-eye area before your concealer.
The Art of the Blend: Tapping, Pressing, and Fading
This is where the visual aspect truly comes into play. The goal is to blend the concealer so seamlessly that it looks like your own skin, just perfected. Aggressive rubbing can disturb the product, push it into fine lines, and cause patchiness.
Instead, gentle tapping or pressing motions are best.
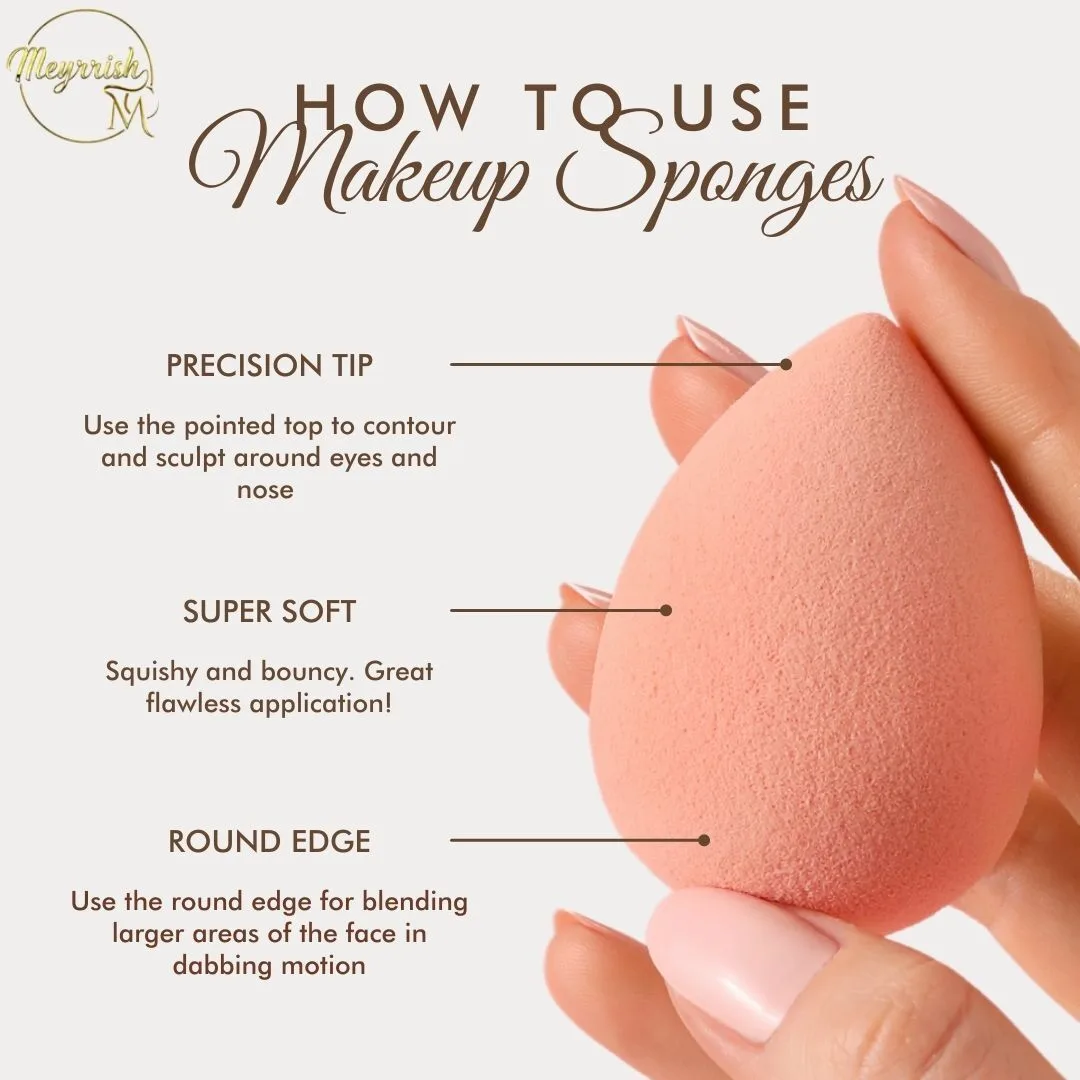
Image source: Bing (Web (fair-use with source credit))
- With a Finger: Your ring finger is ideal because it applies the least pressure. Gently tap the edges of the concealer outward, blending it into your skin.
- With a Makeup Sponge: Use a damp (not wet) makeup sponge. A small, dense sponge works best for precision. Lightly bounce or tap the sponge to blend the edges.
- With a Brush: A small, synthetic brush can be good for precise application and blending, especially around the nose or small blemishes. Again, use a tapping or stippling motion.
The key is to keep tapping until the edges of the concealer diffuse into your skin and it no longer looks like a distinct line or patch. You want it to look like the coverage is coming from within your skin, not sitting on top of it.
Common Concealer Application Mistakes (And How to Fix Them Visually)
We’ve all had those makeup moments where something just doesn’t look right, and concealer mistakes are common. They often stem from not understanding how the product behaves on different skin types or how visual cues can tell you something is off. The good news is that most concealer blunders are fixable once you know what to look for.
When Concealer Creases or Looks Cakey
Creasing is probably the most frequent complaint, especially under the eyes. This happens when concealer settles into the fine lines and wrinkles that naturally form there. It can be caused by applying too much product, the formula being too heavy or dry, or not setting it properly.
Visually, you'll see faint lines appearing where the concealer has gathered. To fix it, gently press the creased area with your ring finger to smooth it out. You can then try using a tiny bit of translucent setting powder patted very lightly over the area to absorb excess moisture and oil.
Caking, where the concealer looks thick, dry, and chalky, is often due to using too much product or a formula that’s too heavy for the area. It can also happen if you're trying to layer too many applications without proper blending in between. Visually, it looks like a noticeable mask that doesn't blend into the skin.
The fix involves gently buffing the excess product away with a clean brush or sponge and then reapplying a thinner layer, focusing on blending the edges.
The "Ashy" Effect: Why It Happens and How to Avoid It
Seeing an ashy or grayish cast after applying concealer is a clear sign that your shade isn't quite right for your skin tone. This typically occurs when a concealer with a cool or neutral undertone is applied to skin with a distinctly warm undertone, or when a shade is simply too light. The cool pigments in the concealer can counteract the warm pigments in your skin, resulting in that dull, ashy look.
To avoid this, take extra care with shade matching, paying close attention to undertones. If you've already applied an ashy concealer, you might be able to correct it by gently blending a more suitable shade of concealer over the top, or by lightly dusting a bronzer or warmer-toned powder over the area. Manufacturer specifications for many concealer lines now include detailed undertone guides to help consumers make more informed choices online.
Emphasizing Texture vs. Smoothing It Out
Concealer's job is to camouflage, not to highlight texture. If your concealer makes blemishes look more prominent or under-eye lines more noticeable, it’s not working for you. This can happen if the formula is too dry, too thick, or if you're applying it too heavily on an area that already has texture.
For blemishes, a creamy or liquid concealer that can be precisely applied is often best. For under-eye areas, a hydrating, flexible formula that moves with your skin is preferable.
Visually, you'll notice that the area looks rougher or more pronounced after application. The fix is often in the application technique: use less product, opt for a more hydrating formula, and ensure you're blending the edges feather-lightly. For textured areas like acne, using a small, dense brush to tap the product on and then gently buffing the edges can help it melt into the skin rather than sit on top.
Choosing the Right Concealer: Features to Look For
When you're in the makeup aisle, or scrolling online, the sheer number of concealer options can be overwhelming. But understanding a few key features can help you narrow down your choices and find a product that actually works for your needs. It’s all about matching the product’s capabilities to what you want it to do for your skin.
Formula Types: Liquid, Cream, or Stick?
The formula of a concealer dictates its texture, coverage, and how it wears throughout the day. Knowing the differences helps you pick the right one for your specific concern and skin type.
- Liquid Concealer: This is often the most versatile. Many liquid concealers offer buildable coverage, from sheer to full, and come in various finishes (matte, satin, dewy). They are generally good for most skin types and can be used for under-eye brightening or spot concealing. They're often easy to blend.
- Cream Concealer: Typically thicker and more emollient than liquids, cream concealers usually offer medium to full coverage. They tend to be very blendable and hydrating, making them excellent for dry skin or for covering dark circles. They might come in pots or palettes, allowing for custom shade mixing. Aggregated user feedback suggests that cream formulas offer a robust option for concealing significant discoloration.
- Stick Concealer: These are solid formulas in a twist-up stick form. They are often high-coverage and can be matte or satin. Stick concealers are great for targeted application on blemishes or areas needing opaque coverage. However, some can be a bit drier, so they might not be the best choice for very dry under-eye areas as they can potentially emphasize texture if not blended well.
Coverage Needs: Sheer to Full
Concealers are categorized by their coverage level, and this is a major factor in choosing the right product.
- Sheer Coverage: These concealers offer a light veil of color, just enough to subtly even out tone or add a hint of brightness. They’re good for minor imperfections or if you prefer a very natural look. They won't fully mask significant dark circles or blemishes.
- Medium Coverage: This is a popular choice for many as it provides enough pigment to conceal common concerns like mild dark circles or redness without looking heavy. Medium coverage concealers are often buildable, meaning you can apply a second layer for more opaque coverage where needed.
- Full Coverage: As the name suggests, full coverage concealers are designed to completely hide imperfections. They are ideal for significant dark circles, stubborn blemishes, hyperpigmentation, or any area where you need maximum concealing power. You need to be careful with full coverage formulas, as they can sometimes look heavy or cakey if not applied and blended properly.
Concealer Use Cases: Tackling Specific Concerns
Concealer isn't a one-size-fits-all product; it's a targeted treatment for various skin concerns. Understanding what you want your concealer to do will help you choose the right type and apply it effectively. Whether it's brightening tired eyes or making a blemish vanish, there's a concealer strategy for you.
Brightening Those Undereyes
The under-eye area is delicate and often shows signs of fatigue, darkness, or puffiness. To brighten, you'll typically want a concealer that is one to two shades lighter than your natural skin tone. This difference creates a subtle highlight, lifting the area and making you look more awake.
A liquid or cream formula with a hydrating finish often works best here, as it won't settle into fine lines.
- Application Tip: Apply in an inverted triangle shape, starting from the inner corner of your eye and extending down and out towards your cheekbone.
- Blending: Gently tap with your ring finger or a damp sponge until it melts into your skin, avoiding any harsh lines.
- Color Correction: If your dark circles are particularly deep or have a bluish/purplish tone, you might benefit from using a peach or orange-toned color corrector before applying your brightening concealer.
Camouflaging Blemishes and Redness
When it comes to covering pimples or redness, the goal is seamless integration so the blemish disappears. You'll want a concealer that closely matches your exact skin tone, no lighter, no darker. A matte or natural finish is often preferred to avoid drawing attention to the spot with shine.
Cream or stick formulas can be very effective here because they tend to offer more opaque coverage.
- Application Tip: Use a small, precise brush or your fingertip to dab a small amount of concealer directly onto the blemish. Avoid swiping, which can spread the product too thinly or irritate the spot.
- Blending: Gently tap the edges of the concealer with your finger or a small brush until it blends with the surrounding skin. The center should remain opaque.
- Redness: For general redness, such as around the nose or cheeks, you can use a slightly more liquid formula and blend it outwards, much like you would with a sheer foundation. Some concealers are formulated with green pigments to neutralize redness directly.
Pro Tips for Next-Level Concealer Results
Achieving that perfectly blended, undetectable concealer finish often comes down to a few expert techniques. These tips go beyond the basic application and focus on refining your technique for a professional look that lasts. Paying attention to these details can significantly elevate your makeup game and make your concealer work harder for you.
Layering with Foundation: The Seamless Integration
The relationship between your foundation and concealer is crucial for a cohesive look. Ideally, your concealer should seamlessly integrate with your foundation, not create a noticeable border. If you apply foundation first, your concealer then acts as a targeted touch-up, blending into that pre-existing base.
If you prefer to use concealer before foundation, think of it as a base layer that foundation will then go over.
Our editorial analysis of user feedback suggests that applying a thin layer of foundation over pre-concealed areas can help further meld the products. The key is ensuring the undertones and finishes are compatible. A dewy concealer under a matte foundation might look disconnected, and vice versa.
Many cosmetic manufacturers offer foundation ranges designed to complement their concealer lines, making shade and finish matching simpler.
Setting for Longevity: Powder Power
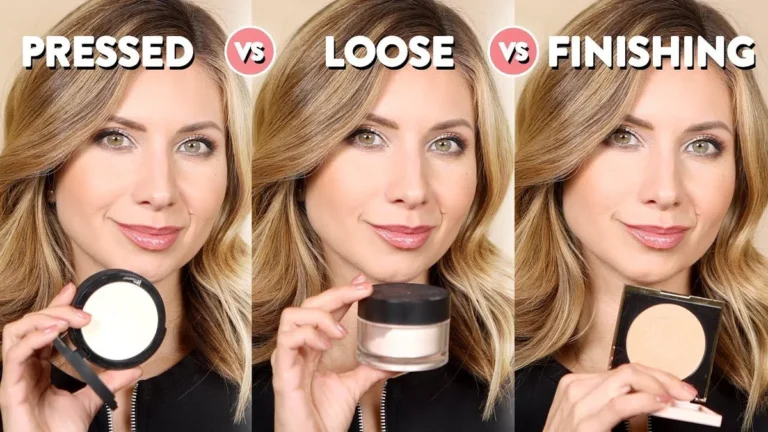
To ensure your concealer stays put and doesn't crease or slide throughout the day, setting it with powder is essential. This step helps to absorb excess moisture and oil, creating a more durable finish. However, applying too much powder can make the area look dry or cakey, so precision is key.
A fine-milled, translucent setting powder is usually the best choice for under-eye areas to avoid adding any extra color or heaviness.
- Application Technique: Use a small, fluffy brush or a puff. Lightly pick up a small amount of powder.
- Pat, Don't Sweep: Gently pat or press the powder onto the concealed areas, especially in the creases where creasing is most likely to occur. This locks the concealer in place without disturbing it.
- Less is More: Start with a very small amount of powder. You can always add a little more if needed, but it's harder to remove excess powder without disturbing the concealer.
Frequently Asked Questions About Concealer Application
What's the difference between concealer and foundation?
Foundation is typically applied all over the face to even out skin tone, while concealer is used for targeted coverage on specific areas like blemishes or under-eye circles. Concealer generally offers higher pigmentation and coverage than foundation.
Can I use the same concealer for my under-eyes and blemishes?
Often, yes. However, many people prefer a lighter, more hydrating shade for under-eye brightening and a shade that perfectly matches their skin tone for blemishes. The finish might also differ; a hydrating finish for under the eyes and a matte finish for blemishes can be ideal.
How do I prevent my under-eye concealer from creasing?
Ensure the under-eye area is well-moisturized and primed. Apply concealer sparingly, focusing only on the areas that need coverage. Blend gently by tapping, and then lightly set with a translucent powder using a patting motion.