How Do I Apply Mascara Correctly?

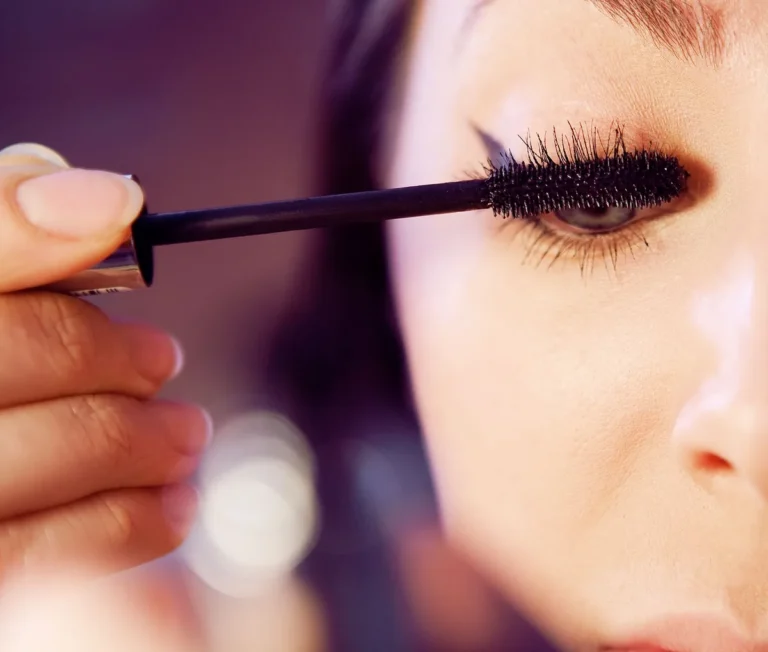
Image source: Web (Bing) / pickpik.com (Web image (fair-use with source credit))
Ever stare in the mirror, mascara wand in hand, and wonder if you're doing it right? You're not alone. Getting that perfect flutter without clumps or smudges can feel like a small victory.
Mastering mascara application isn't about having a steady hand; it's about understanding a few key techniques.
This guide breaks down exactly how to apply mascara correctly, drawing from established makeup artistry principles and manufacturer guidelines for optimal results. We'll cover everything from prepping your lashes to choosing the right wand. By the end, you’ll be able to achieve the defined, voluminous lashes you’re looking for, as of 2026.
Quick Answer
To apply mascara correctly, start with clean, dry lashes. Wipe excess product off the wand. Apply from the lash base, wiggling the wand upwards.
Use a second coat while the first is still slightly wet. Avoid over-pumping the wand.
Seeing the Difference: Why Visuals Make All the Difference with Mascara
When it comes to makeup, especially something as precise as mascara, words can only go so far. You can read about technique, but seeing it in action is a game-changer. Think about learning a new dance move; reading the steps is one thing, but watching someone do it clarifies the rhythm and the body's movement.
Mascara application is similar. Visuals show you the subtle angle to hold the wand, how to tilt your head for better access, and the exact pressure to use. Without seeing these nuances, it's easy to miss the details that prevent clumping and ensure even coverage.
For example, a demonstration would clearly show the slight bend in the wand that helps grab lower lashes, something difficult to describe effectively.
The Essential Mascara Application Toolkit
Before you even reach for a mascara tube, having the right tools and a bit of prep work makes a world of difference. It’s like getting ready to paint; you wouldn't start without the right brushes and a clean canvas. For mascara, the "canvas" is your lashes, and the "brushes" are your wands.
Here’s what you’ll want on hand:
- Your Chosen Mascara: Whether it's volumizing, lengthening, or curling, the formula is key.
- Mascara Wand (Brush): This is the applicator. They come in many shapes and sizes, each designed for a different effect.
- Makeup Primer (Optional): A lash primer can help mascara adhere better and last longer.
- Eyelash Curler (Optional): For an extra lift before mascara application.
- Clean Tissues or Cotton Swabs: For wiping excess product and cleaning up any smudges.
Manufacturer specifications for most mascaras suggest using them within three to six months of opening to maintain product integrity and prevent bacterial growth.
Step-by-Step: Mastering the Mascara Wand
This is where the magic happens. Applying mascara correctly involves a deliberate technique, not just a quick swipe. It’s about building volume and length by working with your lashes, not against them.
Coating the Base: Getting to the Root
The most crucial step is starting at the lash line. This is where you get the most impact for volume and definition.
- Wipe Excess Product: Gently scrape one side of the wand against the rim of the mascara tube. This removes excess product that can cause clumping.
- Position the Wand: Place the wand right at the base of your upper lashes, as close to the eyelid as possible.
- Apply with a Wiggle: Instead of just pulling straight up, wiggle the wand back and forth along the lash roots. This deposits the most product at the base, creating a fuller appearance.
Wiggling for Separation and Lift
Once the base is coated, the wiggling motion becomes even more important for drawing out length and separating each lash.
- Continue Wiggling Upward: As you move the wand away from the lash root towards the tip, maintain that gentle back-and-forth motion.
- Lift and Extend: This action helps to lift the lashes and extend them, making them appear longer and preventing them from sticking together.
Reaching Every Lash: Inner, Outer, and Lower
It’s easy to miss lashes, especially in the corners or the lower lash line. A little technique goes a long way here.
- Inner and Outer Corners: Turn the wand vertically or use just the tip to get into those hard-to-reach inner and outer corner lashes. This ensures an all-around full look.
- Lower Lashes: Use the very tip of the wand and apply with a light touch. Wiggle gently, being careful not to overload the finer lashes, which can lead to a spiderweb effect.
If you've applied a bit too much, a clean cotton swab can be used to gently swipe away any excess before it dries.
Common Mascara Application Pitfalls and How to Fix Them
Even with the best intentions, mascara application can go wrong. These are the usual suspects, and luckily, they're usually easy fixes.
Tackling Clumps and Smudges
Clumping is probably the most common mascara complaint. It happens when too much product is applied, or when coats dry too much between applications.
- What causes it: Over-application, old mascara, or not wiping excess product off the wand.
- How to fix it:
- Prevention is key: Always wipe excess product off the wand before applying.
- The "clean wand" trick: Keep a clean, dry mascara wand (or an old, washed one) handy. While the first coat is still slightly wet, use the clean wand to comb through your lashes. This separates them and removes excess product.
- Avoid old mascara: Mascara that has started to dry out inside the tube is more prone to clumping. Aggregate reviews suggest replacing mascara every three to six months.
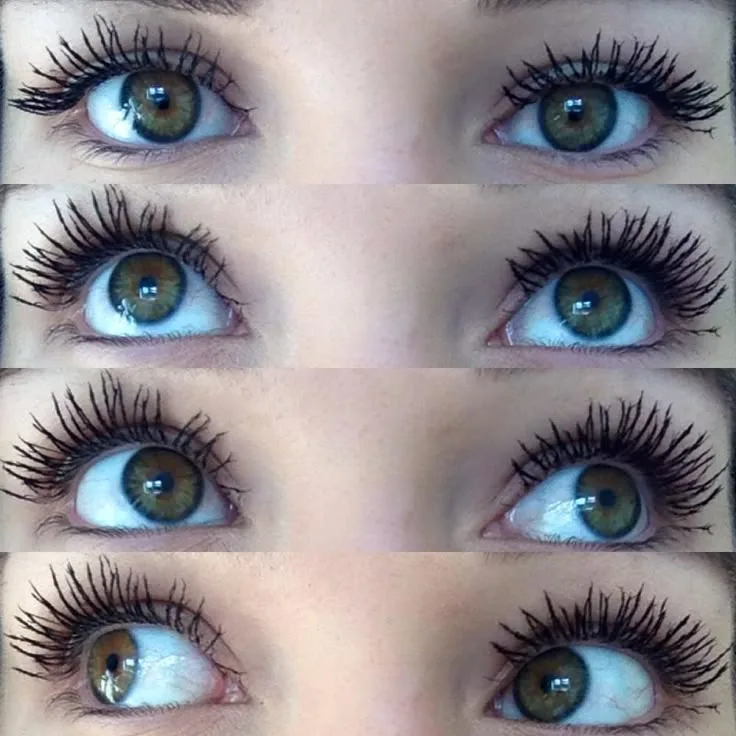
Avoiding the "Spider Leg" Look
This happens when lashes are too heavily coated, overly separated, and look thin and spidery rather than full and feathery.
- What causes it: Too many coats applied too quickly, or a wand with very widely spaced bristles.
- How to fix it:
- Limit coats: Stick to one or two generous coats. If you need more, apply the second coat while the first is still damp.
- Use a finer brush: For lower lashes or very fine lashes, a smaller, precision wand can help.
- Comb through: Use a clean lash comb or the clean mascara wand trick mentioned above to separate.
Mascara on Your Eyelid? No Problem.
A little smudge on the eyelid or under the eye is almost a rite of passage. The trick is to catch it before it dries completely.
- What causes it: Tilting your head too far back, blinking at the wrong moment, or a wand that's too large for your eye shape.
- How to fix it:
- Wait for it to dry slightly: If you notice it immediately, try to leave it. Once the mascara is mostly dry, it's often easier to gently flake off with a dry cotton swab.
- Use a precise tool: A pointed cotton swab dipped in micellar water or makeup remover can carefully lift the stray smudge without disturbing the rest of your makeup.
- Head position: Experiment with tilting your head slightly forward and looking down into a mirror. This often gives you better access to your lash line without your eyelid getting in the way.
Choosing Your Mascara Wand for Your Lashes
The wand is more than just the applicator; it's the tool that shapes your lashes. Different wand shapes are designed to achieve specific results, so understanding them can help you pick the right mascara for your desired look.
Here’s a quick breakdown of common wand types:
- Thick, Dense Wands: These are great for building volume. The sheer number of bristles packs on product and separates lashes to make them look fuller.
- Thin, Spaced-Out Wands: Ideal for lengthening and separating. They tend to grab individual lashes and stretch them upwards.
- Curved Wands: Designed to follow the natural curve of your lash line, helping to lift and curl lashes simultaneously.
- Comb-like Wands: These have distinct "teeth" to separate lashes and remove clumps, offering a very defined look.
- Ball-shaped or Precision Wands: Excellent for reaching tiny inner and outer corner lashes, and for precise application on lower lashes.
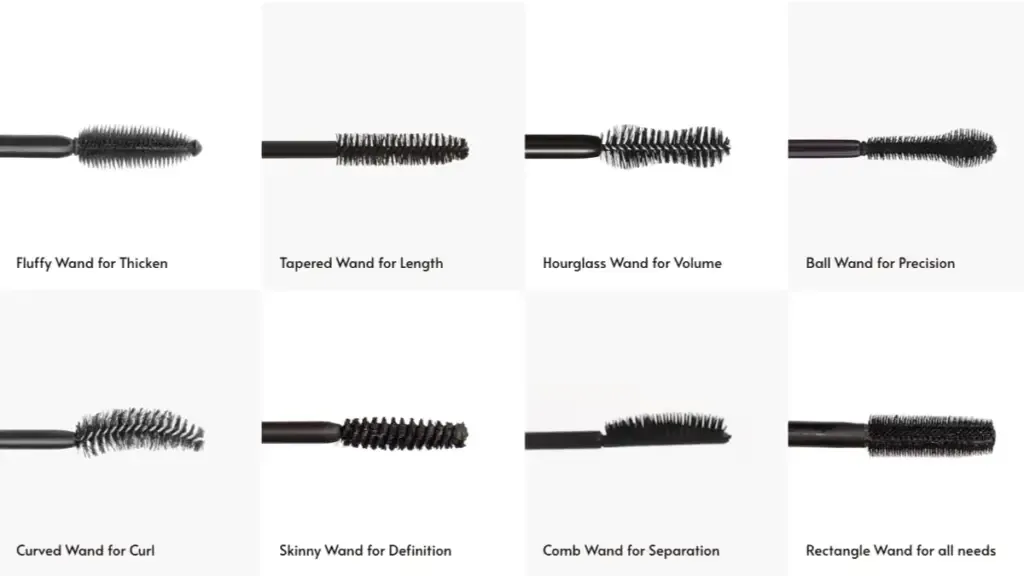
When considering a new mascara, looking at the wand shape pictured on the packaging can give you a good indication of the results it's designed to provide.
Elevating Your Look: Advanced Mascara Techniques
Once you've mastered the basics, a few extra tricks can take your mascara application from good to great, creating a more polished and dramatic effect. These aren't essential for everyday wear, but they can really make your eyes pop for special occasions or when you want to feel a little extra glam.
- Primer Power: Applying a lash primer before your mascara is a pro move. It creates a smooth base for the mascara to adhere to, adds extra length and volume, and can help your mascara last longer without smudging. Look for one that complements your mascara's goal, like a volumizing primer for a volumizing mascara.
- The Double-Dip (Carefully): While generally advised against due to drying out the product, a controlled double-dip can work for dramatic looks. Apply your first coat, let it dry for about 10-15 seconds, then dip your wand again, wiping off any excess. Apply a second coat for extra intensity. This is best done with newer mascara formulas.
- Layering Formulas: Don't be afraid to mix and match. You might use a lengthening mascara on your outer lashes for a fanned-out effect and a volumizing mascara on your inner lashes for fullness.
- Wanding Technique for Curl: To enhance a curl from an eyelash curler, apply mascara with upward strokes, focusing on lifting the lashes from the base. You can even hold the wand at the tip of your lashes for a few seconds to help set the curl.
- Tightlining with Mascara: For an almost imperceptible lash enhancement, use a very fine-tipped wand or a clean spoolie to gently apply a tiny bit of mascara directly to the base of your upper lash line, in between your lashes. This creates the illusion of a fuller lash line.
Frequently Asked Questions About Mascara Application
How long should mascara last on my lashes?
Mascara should ideally stay put without smudging or flaking for the entire day. Factors like formula (waterproof vs. regular), humidity, and oily eyelids can affect longevity. Most mascaras are designed for wear of 8-12 hours.
Can I use mascara on false eyelashes?
Generally, it's best to avoid applying mascara to false eyelashes, especially on the lash fibers themselves, as it can make them look clumpy and unnatural, and reduce their reusability. However, some people lightly apply mascara to their natural lashes before applying falsies for better blending.
What if I have sensitive eyes or wear contacts?
For sensitive eyes or contact lens wearers, look for hypoallergenic or ophthalmologist-tested mascaras. Formulas free from common irritants like parabens, fragrance, and certain dyes are recommended. Always remove mascara thoroughly before bed.
How do I remove waterproof mascara effectively?
Waterproof mascara requires a specific makeup remover. An oil-based or bi-phase (oil and water) remover is most effective. Apply to a cotton pad, hold it against your closed eyelid for about 10-15 seconds to let the product break down, then gently wipe downwards.
Avoid harsh rubbing.
How often should I replace my mascara tube?
It's recommended to replace your mascara every three to six months. This is because mascara wands can harbor bacteria, and the product inside can dry out, leading to clumping and a higher risk of eye irritation or infection.
Does mascara expire?
Yes, mascara does expire, typically within three to six months after opening. Using expired mascara can lead to eye infections and irritation. Always check the consistency and smell; if it seems dry, clumpy, or smells off, it's time for a new tube.
7 Best Clear Lip Gloss: Top Picks For Shine
Applying a clear lip gloss after your mascara can add an extra touch of polish to your overall look. It’s a simple way to enhance your lips without adding color, complementing a wide range of makeup styles.
7 Best Lip Gloss: Top Picks For Shine And Comfort
Similar to clear gloss, tinted lip glosses offer shine while adding subtle color. If you're looking for a touch more vibrancy to complement your defined lashes, a gloss can be a great option.
Best Brown Lipstick: Top Shades For Every Skin Tone
For those who prefer a bolder lip, brown lipstick offers a sophisticated and versatile choice. Pairing a rich brown lip with well-applied mascara creates a classic, put-together aesthetic.
Best Pink Lipstick: Top Shades For Every Skin Tone
Pink lipstick can range from subtle and sweet to bold and vibrant. Depending on the shade, it can either play up your eye makeup or provide a lovely contrast to your defined lashes.
Best Red Lipstick: Top Picks For Every Skin Tone
Red lipstick is a timeless statement. When paired with perfectly applied mascara, it creates an iconic, glamorous look that’s hard to beat for any occasion.